
The next step for Emergency Calls is to establish the Dispatchable Locations. For this, we go to PBX > Emergency Calls > Dispatchable Locations.
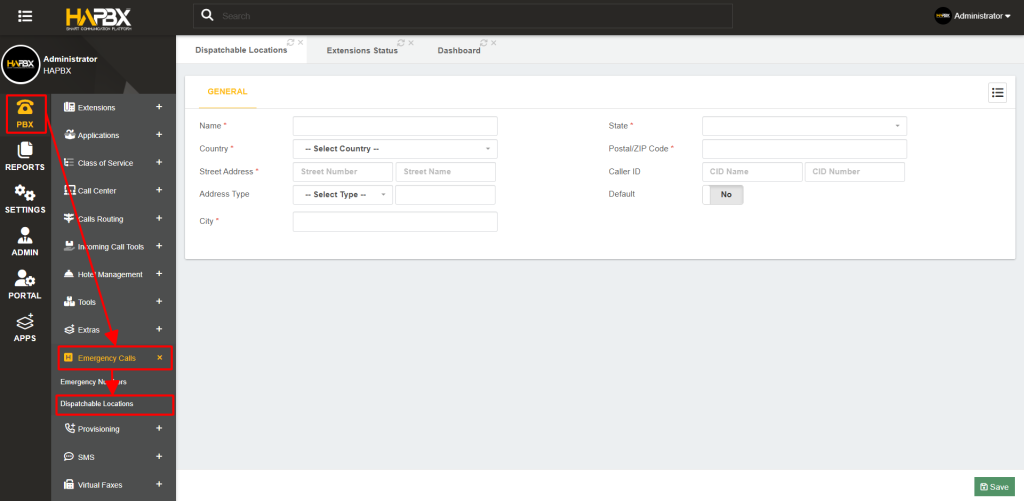
Dispatchable locations allow us to identify the location from where an emergency call is placed.
This location can be added to the email sent with the Emergency Call Template to the email addresses we added to the Emergency Numbers.
For the dispatchable locations, we add a Name to identify this location, and enter the Address and Caller ID information we will use for this location. Usually, when you have an e911 service, you identify a location using special Caller ID information. So, you can associate that CID information with your dispatchable location. You can also set this location as default, so even if you don’t specify a dispatchable location for an extension or hot desking device, the default location will be used. You can then Save and Apply Changes. You can create as many dispatchable locations as you need. Now, you can assign the dispatchable locations to any extension under the device settings, and to hot desking devices. Extensions and Hot Desking devices have their own Emergency CID information so the Caller ID information is different from any External Caller ID. With this, you now have an Emergency Call flow that will ensure that your end-users can place emergency calls without any hassle and are safe to call at any time.


