
Groups in VitXi allow administrators to organize users for better communication, visibility, and management control.
A user can belong to one or multiple groups, which makes it easier to manage permissions, chat visibility, and contact sharing within an organization.
1. Access the Groups Module #
- Log in to the VitXi Administrator Panel.
- Navigate to Management → Groups.
- You’ll see a list of existing groups, including the Default Group automatically created during installation.
2. Creating or Editing a Group
Fill in the following fields:
| Field | Description |
|---|---|
| Name | The name of the group (e.g., Sales, Support, Call Center Team). |
| Description | A short description of the group’s purpose. |
| Tenant | Displays the tenant the group belongs to. (Note: The tenant cannot be changed once the group is created.) |
Click Save to create or Update to modify an existing group.
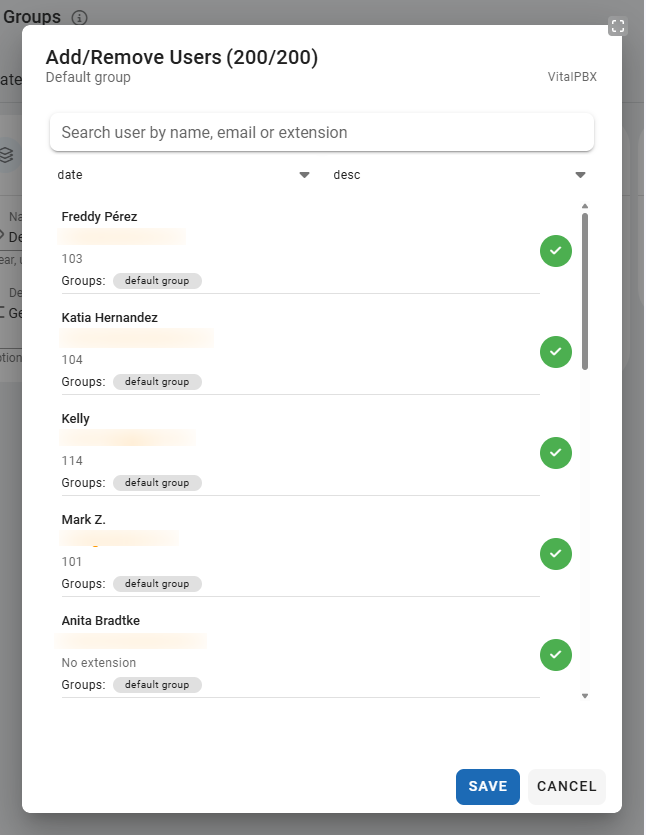
Adding or Removing Members #
Each group can include one or multiple users.
To manage group members:
- Open the group you want to edit.
- Click the Members dropdown or icon.
- A popup window will appear where you can search users by name, email, or extension.
- Select or deselect users to add or remove them from the group.
- Click Save to confirm your changes.
Tip: Groups are used for chat visibility, contact organization, and permission segmentation. For example, users in the same group can message each other directly in VitXi.
Group Settings (Member Limit) #
Administrators can set a maximum number of members allowed per group to prevent server overload and optimize performance.
- Go to Management → Groups → Settings.
- Adjust the Member Limit field (default: 150).
- Click Save to apply the new limit.

Note: Increasing the group size beyond the recommended limit may impact real-time communication performance, especially in large call center environments.


